Showing posts with label Ribbon. Show all posts

Monday, January 28, 2013

It's a Boy!! Diaper Bouquet

One of my dear friends is all set to welcome her baby boy to the world!  I am so thrilled for her and husband.  During one of our sister luncheons, she commented on wanting diapers for the baby.  Not one to just hand over a bag of diapers, I had to do something special.  My latest haunt is Pinterest.  I get a ton of inspiration there.  So here is my adaptation of a diaper bouquet.  It was a lot of fun to make.  I hope my friend loves it as much as I love her!


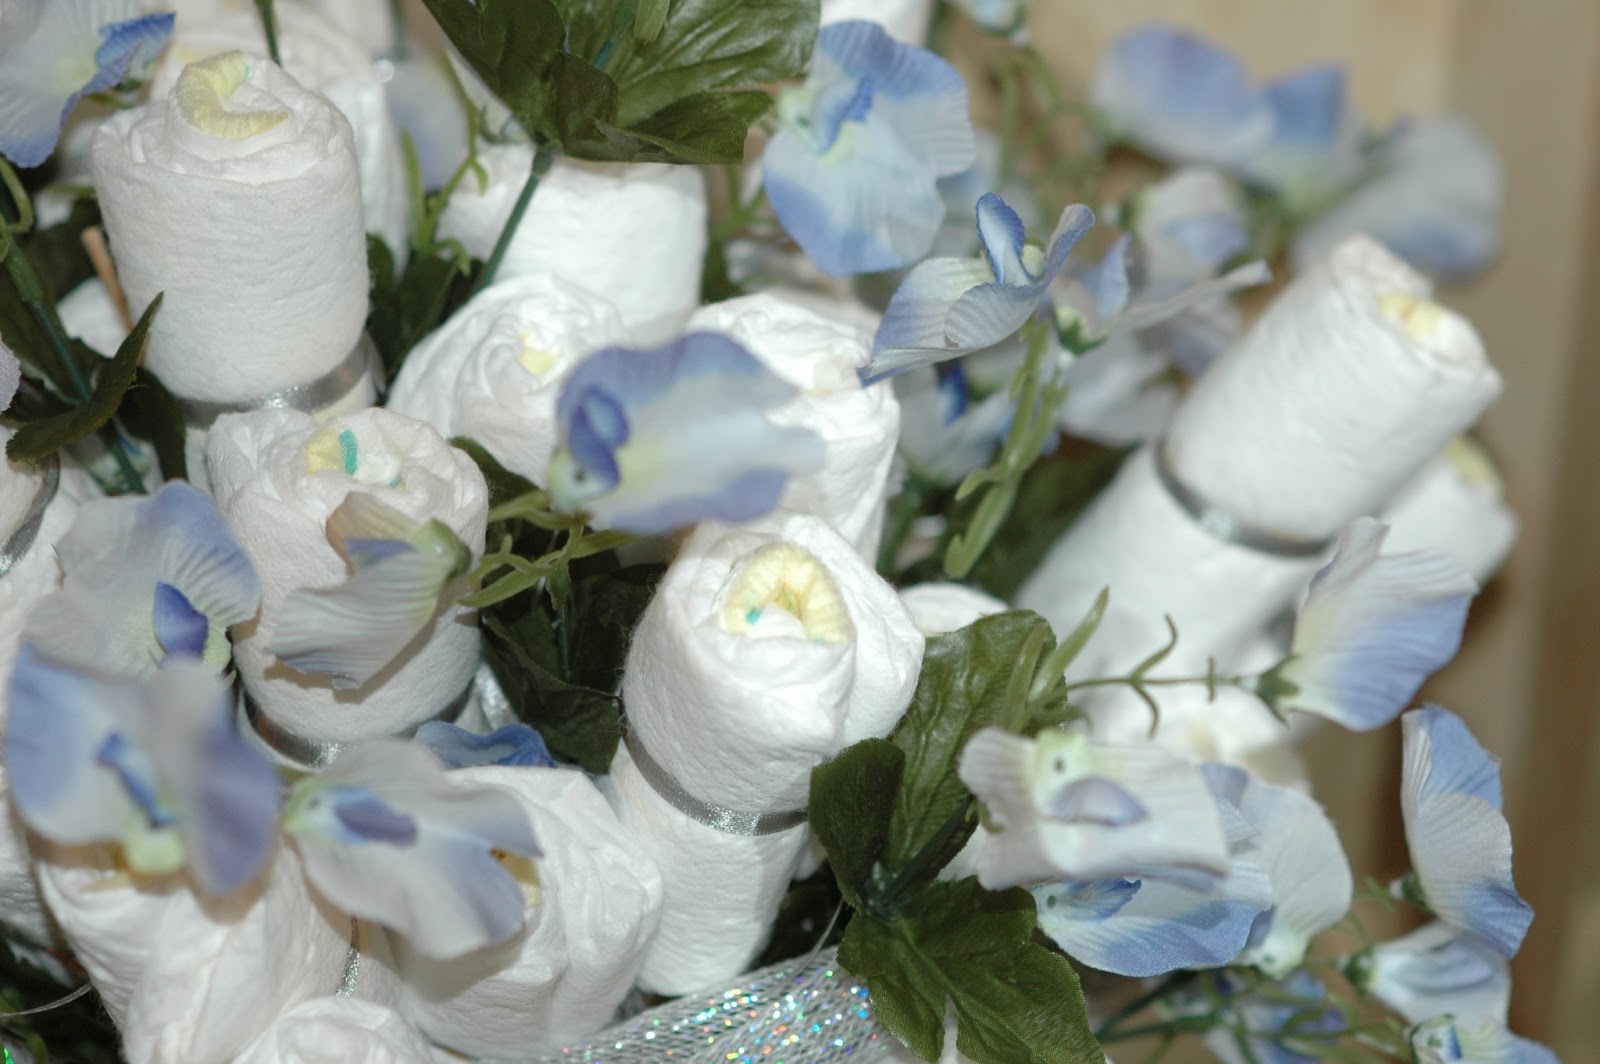
Ingredients included:
A vase
Colored Marbles
A floral cone
Rubber bands
Ribbon
Tulle
BBQ skewers
Diapers
Artificial flowers

Tuesday, May 29, 2012

What's life without a swap?

Nowadays, it seems like I only make time to craft if it is associated with a deadline.  This card is not an exception.  It was created in time for a swap deadline over at SOC. I combined some pretty paper, mixed it up with some stamps to great this floral card.  It was to be a feminine card with a little bling.  I think I rose up to the challenge!


Monday, August 29, 2011

Ribbon Wreaths!

It's holiday time, well almost!  
I saw a recent post on the SOC boards and since I had a nice stash of ribbon, I decided to give the ribbon wreaths a try.  


I made both over the week-end and probably the longest time was spent cutting the ribbon.


I was pretty pleased with how the Thanksgiving wreath turned out and took it over my Mom's house to show her.  Mom is also pretty crafty.  She liked it so much that she put in an order for her own Christmas wreath.  :)


Someone asked me how much ribbon did I use?  For both wreaths, I used to full spools of the base colors, plus the wreath is wrapped in a coordinating think ribbon.  All in all, I think each wreath took about 3 hours.  All of my work was done in different sessions so it's hard to estimate.  I used straight pins versus hot glue to tie it all together.  These were fun to make and I might try to round up some friends for a little workshop to show them how to make them as well.


Thursday, August 18, 2011

Helping Out A Friend

Recently, I met some new scrapbook friends and they were asking be about inking, chalking, dry embossing, etc.  So while at the crop, I made two quick projects with them to demo some scrapbooking techniques. 

For the card front, we embossed it with the Cuttlebug.  We altered wedding flowers from Walmart with ink to give them color.  We set the flowers with eyelets on the card.  We inked the edges of the card.

On the bookmark, we used an acrylic block and clear stamps.  We inked the stamps with different colors and mounted a chalked flower with an eyelet to the bookmark.  We actually did two bookmarks and adhered them together to make it more pleasing to the eye.  To finish it off, we embellished with ribbon.  

Both ladies were pleased with their projects and the new techniques they learned.


Sunday, August 14, 2011

Holiday project for JoAnn's!

For the months of November & December, we will be featuring this papercrafting project at my local JoAnn's store.  I thought it would be fun to give it a try before the classes actually kicked off.  


This holiday ball was created using a foam ball and several different paper punches.  It was fun, but time consuming to make.

This shows the details of the punch.  I used an EK Success border punch , layered it twice and then rolled it.  

The red flower is another example using an EK Success punched that was double layered and then rolled.
I also used a Fisker's scalloped punch for the flower creations.  

Corsage pins were used to hold everything together.

Sheer red and white ribbon was doubled up to create a bit of pizzazz!

This is the final product.
Thanks for looking!

Sunday, April 3, 2011

Baby Shower Album

In lightening speed, I created this baby shower album.  It was a very quick turnabout but it was to help a friend out.  I had travel plans and got sick along the way, but all in all, I got it done in the nick of time.  Thanks to the help of my SOC sisters with words of encouragement!  While the album has details, it's not my usual amount of details but I'm still pretty pleased with the outcome.  The new Parents were very excited to receive it so it makes it all worthwhile.


Also, for the shower I created a gift journal and a gift bucket (instead of a gift bag.)  The gift bucket contains an outfit for the new arrival and inside, there is another smaller matching jar with a gift card.  The gift bucket and outfit are both monkey themed.


Altered Journal Cover to include show invite and colors of Mother's sorority

The Album was a 12x12 Recollections brand from Michael's.  We wanted to keep the plastic cover on it so I made an insert to personalize the album.

The first page of the album was borrowed from a sketch in the 2nd edition of the Cricut magazine on page 33.  The original LO was a "DAD" layout and I made it a baby LO!  ;-) 

Daddy is a Kappa.  The colors were chosen to represent his fraternity as well as one of his hobbies.


Mom is always accessorized and is an AKA.  I wanted to make her page extra special.


To add a little extra bling, I added Stickles to the journaling spots and Glimmer Mist to the photo mats.  The Pink Petaloo Flowers were also stained with Glimmer Mist to great the great color combo for this page.  i-Rock gems were also included for a little extra bling.


This page was added to capture the colors of the shower invite.  i-Rock gems were added througout this layout for some visual interest.  Also a metal embellishment was added to page 2.  


Best Wishes page - guests at the shower were ask to complete 3x5 index cards regarding their best wishes for the family.  The edges of the journaling blocks were inked for a little extra pop.

The Sentiment was chalked with blue and green loose powder chalks.  

Second page of the well wishes cards.  The bottom layer was also chalked and heart shaped brads were added.

This page features a ribbon border offset with a Fiskars punch.
I used my Gypsy to make a custom title for the page and used store purchased embellishments to tie it all together.


The train from the New Arrival cartridge was added to include the family surname across a 2-page LO.  The wheels were embellished with brads.  


The tree was flocked using Zig 2 way glue and green flock.  

Cricut markers were used to outline the scalloped shape.
The safety pins were shadowed using Kraft paper.
The So Sweet sentiment was pop-dotted to add some dimension.


New Arrival Monkey on the gift bucket.
I used an Easter gift bucket from Jo Ann's with a green top to create a gift bucket for the new addition.
Within the gift bucket was an outfit and a matching canister with another gift inside.


Various ribbon cut at 5" adorns the handle.

Twine holds together the banner featuring the baby's name.
The grass is cut from Plantin School book.  The paper used to make the grass has a slight pattern.

K& Company flowers.


Thanks for looking!

Sunday, March 20, 2011

Did someone say cards?

Just like call good scrappers, I probably have a bit of excess and odds and ends laying around from my scrapbook pages.  Unlike a lot of you, I'm not that good at either scrapping or card making but at least attempting to do so keeps me occupied!  lol

Here are a bunch of cards I've made in the past month from different items.  I tried to use what I had on hand as well as try a few new things as well.  I hope you like my crafty creations!

I think the black and white cards with a pop of color are elegant spring time additions - if I do say so myself!! haha  The black and white paper was purchased at Hobby Lobby in Michigan.

Thanks for spending time with me!